LAYING A PATIO: STEP BY STEP GUIDE
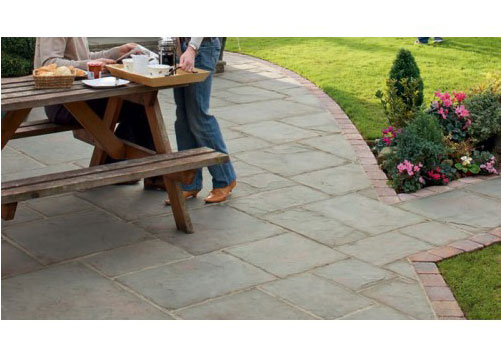
Your complete step by step guide to crafting the perfect outdoor space and laying a patio, from initial planning to the final touches.
Now the supposedly drier weather is upon us, it’s the time of year when we think about improving our garden areas. With this is mind, we have put together this handy guide to help with the laying of your new patio area.
Plan your patio
Once you’ve decided where you would like the patio to go, make a detailed plan, ideally on graph paper. Try to do this using the correct scale. Make sure you mark the position of permanent fixtures such as the house, any walls or fences, trees or large shrubbery and manhole covers.
When drawing your plan, remember to think about the laying pattern you are using. This will ensure you order the correct amount of slabs and alleviate the need for excessive cuts.
Before you start, it is also good practice to dry-lay your patio. When doing this, remember to leave a 10-15mm gap for straight edge slabs and a 10-30mm gap if using fettled edge, natural stone or heavily riven slabs.
Time to start digging!
Before you start to excavate, you will need to accurately mark out the patio area. This can be done by correctly measuring and marking out with string lines and pins. When doing this, be careful to incorporate the correct fall. A minimum fall of 1:60 (example is 50mm over 3mtr) is required to provide adequate drainage away from the property.
Other things to take into account are the level of existing paving and manhole covers. The critical factor before commencing with the dig is to make sure that the finished level of the patio is at a minimum depth of at least 150mm below the DPC level if the patio is being placed next to a house. It is useful to use wooden stakes at corners where the string lines meet. On these, you can mark on the required depth of hardcore/base, bedding mortar and paving depth.
A solid foundation
Once the area has been taken down to the correct level, in this case, 300mm below the DPC level, it is paramount that a suitable solid foundation is laid. For this example, 75mm of good quality hardcore/sub-base will need to be laid. Once down, rake out and lumps and bumps so that the surface is level. You will then need to use a powered wacker plate to compress the hardcore until it provides a solid, compacted surface.
Preparing the base
As the slabs we are using in this example are 40mm deep, a 35mm layer of bedding mortar will need to be laid. For the purpose of this guide, we are using a full mortar bed.
To mix the mortar, use 6 parts of sharp/grit sand and 1 part of cement.
Time to start laying your patio
One final check before starting. With a builders’ square, make sure that the string lines are square. If they aren’t, adjust accordingly.
If the patio is situated next to the house, start in the corner next to the house wall and work away from the house.
Spread out the mortar, allowing for an area slightly bigger than the size of the first slab you are about to lay.
Now lay the first slab and tap down gently and evenly, ensuring it is perfectly aligned to the guide strings. Remember to check the level to make sure it has a sufficient fall away from the house. When you’re happy with the position, you can carry on with the rest of the paving. Don’t forget to leave the correct gaps as described earlier. It is also important to keep checking the level and fall of the patio with a long spirit level.
Almost there
When the laying of slabs is completed, it is a good idea to leave at least 24 hours before walking on to allow for the bedding mortar to harden. After this time has elapsed, sweep down the patio so you have a nice clean surface.
It is now time to start the pointing (filling the gaps between the slabs). This keeps the slabs stable and prevents the growth of weeds. Mix 3 parts of soft sand to 1 part of cement. A plasticiser can also be added to make the mortar more workable. To test that you have the right consistency, take a handful and squeeze it. The mortar should stay as a firm, wet ball when you open your fingers and not crumble or ooze water.
Press mortar into the gaps with the edge of a pointing trowel. Take care not to get too much mortar on the paving. After about 2 hours, clean off any excess mortar with a stiff brush. Once this has been done, the patio can be wiped clean with a damp sponge and clean water to remove any traces of cement.
That’s it. The perfect patio!
What equipment will I need?
You need to make sure you have the correct tools before starting your project. You will need the following:
- Shovel
- Rubber Mallet
- String Line
- Spirit Level
- Pointing Trowel
- Gloves
- Bucket
- Builders’ Square
- Sponge